What to Do with Fabric Scraps: Easy “Hi” Banner
Many of us bask DIYing projects that involve fabric in one mode or another. Trouble is, we often end up with so many fabric scraps that we're not quite certain what to do with them. Has that happened to you? Similar, you dearest the fabric and can't quite bring yourself to throw it out, but you're at a loss equally to what y'all actually can do with the material scraps.
 View in gallery
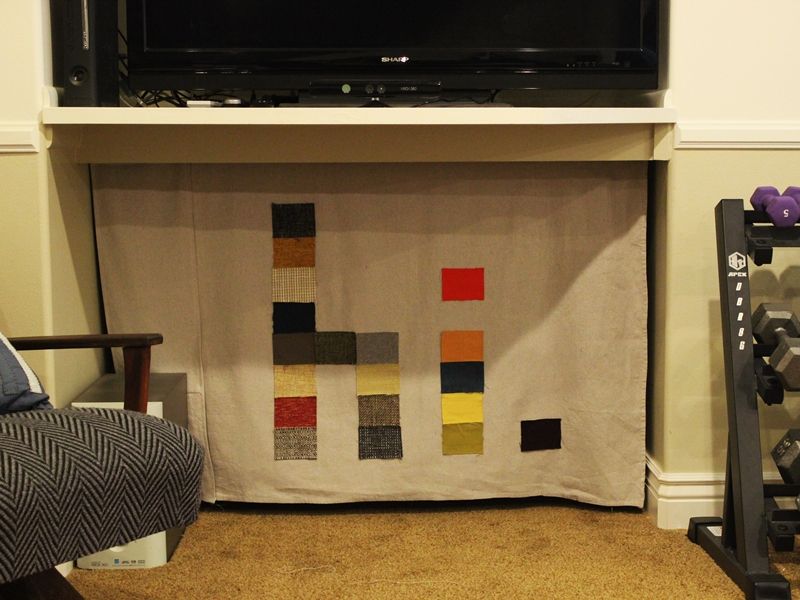
 Maybe you lot should create a cloth scrap banner to hang in your abode? This no-stitch DIY project not merely reuses fabric scraps y'all already have, but it also is a keen way to add a big "art" piece to the wall for little to no price. Here's a step-by-step guide on how to create such a thing, although information technology'southward really non hard. Give yourself xxx minutes, and you'll be patting yourself on the dorsum for a job well done.
 View in gallery
 Materials Needed:
- Cloth scraps of your option, cut to same size rectangles
- Large piece of fabric for the banner itself
- Hot glue gun & glue sticks
 View in gallery
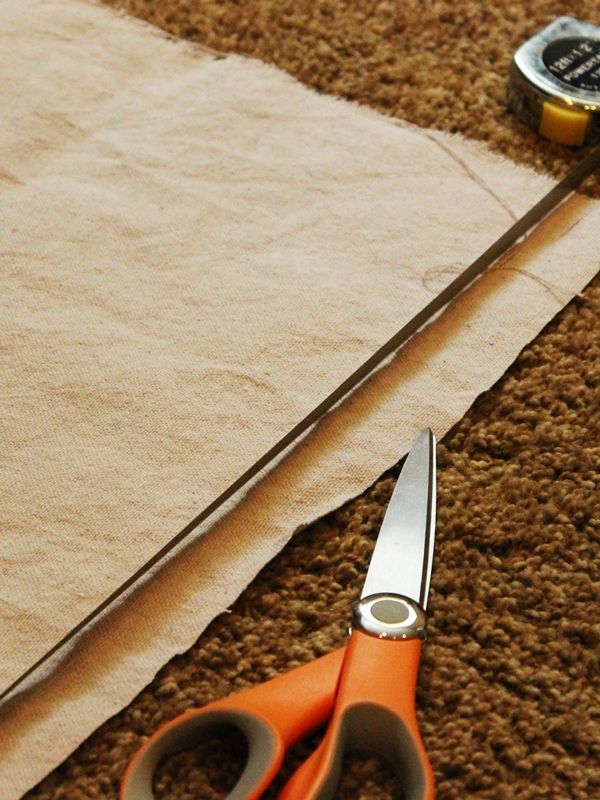
 Step 1: Measure and cut fabric to size. My banner is 46" broad by 36" alpine, but y'all could (should!) customize yours to fit the infinite you have.
 View in gallery
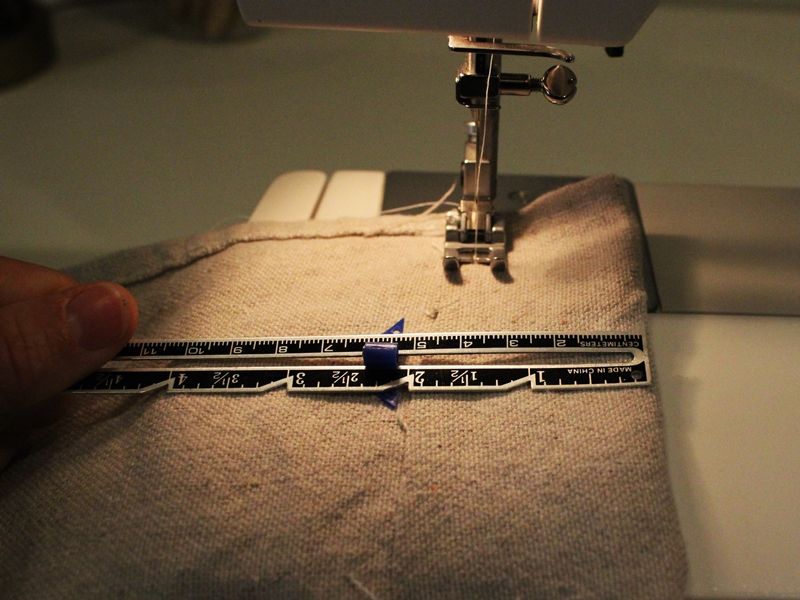
 Stride two: Hem the four edges of your blank banner. Determine how you want to hang your banner. This tutorial shows a banner existence hung past a jump-loaded curtain rod, but you could really hang it anyway you want – pins, ribbon, a wooden dowel, regular curtain rod, etc.
 View in gallery
 Footstep 3: Atomic number 26 the imprint. This footstep is technically optional…but non really. Iron it. It'southward an "extra" footstep in the DIY that volition make all the departure in the polish of your last hanging banner.
 View in gallery
 Step 4: Gather or prepare your fabric scraps. The fabric scraps I'1000 using are upholstery samples (from Thrive) that I loved and then much I couldn't bring myself to throw them out, fifty-fifty though they've sat around for years because I had zilch to really practise with them. Sound familiar?
 View in gallery
 Step 5: Lay out fabric scraps in the form, shape, or word of your option. My textile scraps fit perfectly into the give-and-take "hi." And then that's what management this project took. You lot could do an animal silhouette, a family initial, another word, whatsoever you desire.
 View in gallery
 Step vi: Hot gum the scraps into place. Once your position is perfect, start gluing the pieces into place, one at a fourth dimension.
 View in gallery
 Tip: Be careful to move chop-chop, simply non also quickly. Make sure that the hot glued side of your fabric scrap is perfectly positioned earlier yous set it downward, or information technology'll make a big hot-glue-stringy mess when y'all peel it off to re-position.
 View in gallery
 Pace 7: Trim whatever stray strands.
 View in gallery
 Footstep 8: Hang the banner.
 View in gallery
 Step 9: Enjoy your new beautiful creation…and the fact that information technology took less than a half an hour to make. That is one fast and like shooting fish in a barrel fob for using those fabric scraps!
 View in gallery
 What are other ways you like to apply your fabric scraps or word art in your home?
Source: https://www.homedit.com/fabric-scraps-banner/
0 Response to "What to Do with Fabric Scraps: Easy “Hi” Banner"
Publicar un comentario